The Visual Module of VPython - Reference Manual
Date de publication : 4 février 2009
Working with objects
Color and Opacity
Lighting
Materials and Textures
Defaults
Animation Speed
Rotations
Additional Options
Delete an Object
3/4 = 0 ?
Working with objects
Color and Opacity
Color
In the RGB color system, you specify a color in terms of fractions of red, green, and blue, corresponding to how strongly
glowing are the tiny red, green, and blue dots of the computer screen. In the RGB scheme, white is the color with a maximum of
red, blue, and green (1, 1, 1). Black has minimum amounts (0, 0, 0). The brightest red is represented by (1, 0, 0); that is, it
has the full amount of red, no green, and no blue.
Here are some examples of RGB colors, with names you can use in Visual:
| (1,0,0) color.red |
(1,1,0) color.yellow |
(0,0,0) color.black |
| (0,1,0) color.green |
(1,0.5,0) color.orange |
(1,1,1) color.white |
| (0,0,1) color.blue |
(0,1,1) color.cyan |
|
| |
(1,0,1) color.magenta |
|
You can also create your own colors, such as these:
(0.5, 0.5, 0.5) a rather dark grey; or you can say color=color.gray(0.5) to mean (0.5,0.5,0.5)
(1,0.7,0.2) a coppery color
Colors may appear differently on different computers, and under different 3D lighting conditions. The named colors above are
most likely to display appropriately, because RGB values of 0 or 1 are unaffected by differing color corrections ("gamma"
corrections).
The VPython demo program colorsliders.py lets you adjust RGB sliders to visualize colors and print color triples that you copy
into your program. It also provides HSV sliders to adjust hue, saturation (how much white is added to dilute the hue), and
value (brightness), which is an alternative way to describe colors.
Visual only accepts RGB color descriptions, but there are functions for converting color triples between RGB and HSV:
c = (1,1,0)
c2 = color.rgb_to_hsv(c)
print hsv
c3 = color.hsv_to_rgb(c2)
print c3
|
Another example: sphere(radius=2, color=hsv_to_rgb( (0.5,1,0.8) )
Opacity
You can make most objects be transparent by specifying a value from 0-1 inclusive for the attribute "opacity". For example,
box(color=color.red, opacity=0.8) is slightly transparent. An opacity value of 0 means totally transparent, and 1 means totally
opaque. Currently curve, convex, faces, points, and helix objects do not allow transparency.
You may see incorrect rendering any time there is a translucent object (opacity < 1.0) which is not convex
(e.g. ring), or two translucent objects which overlap on the screen and also in their depth extents (distances from the camera
to the nearest and farthest planes perpendicular to scene.forward which intersect the object). The objects need not actually
overlap in 3D space to have problems. The incorrect rendering will usually have the effect of making the more distant object
disappear (fail to show through the nearer object). Accurate rendering of ad hoc scenes with translucency is difficult and
expensive, and we did not want to wait for a perfect solution before introducing this useful enhancement.
Lighting
Controlling One or More Visual Display Windows
Initially, there is one Visual display window named scene. Display objects do not create windows on the screen unless they are
used, so if you immediately create your own display object early in your program you will not need to worry about scene. If you
simply begin creating objects such as sphere they will go into scene.
display() Creates a display with the specified attributes, makes it the selected display, and returns it. For example, the
following creates another Visual display window 600 by 200, with its upper left corner at the upper left corner of the screen
(y is measured down from the top of the screen), with 'Examples of Tetrahedrons' in the title bar, centered on location (5,0,0),
and with a background color of cyan filling the window.
scene2 = display(title='Examples of Tetrahedrons',
     x=0, y=0, width=600, height=200,
     center=(5,0,0), background=(0,1,1))
|
General-purpose options
select() Makes the specified display the "selected display", so that objects will be drawn into this display by default; e.g.
scene.select()
Executing myscene = display.get_selected() returns a reference to the display in which objects are currently being created.
foreground Set color to be used by default in creating new objects such as sphere; default is white.
Example: scene.foreground = (1,0,0)
background Set color to be used to fill the display window; default is black.
ambient Color of nondirectional ("ambient") lighting. Default is color.gray(0.2); for compatibility with earlier versions of
Visual, this can be expressed as scene.ambient=0.2. Also see the following lights attribute.
lights List of light objects created for this display. By default, a display has two distant lights:
distant_light(direction=(0.22, 0.44, 0.88), color=color.gray(0.8)) and
distant_light(direction=(-0.88, -0.22, -0.44), color=color.gray(0.3)).
These are equivalent to the default lights in Visual prior to version 5. You can get rid of these default lights with
scene.lights = []. The color of light objects and the amount of scene.ambient must be specified with some care, because if the
total lighting intensity exceeds 1 anywhere in the scene the results are unpredictable. scene.lights is a list of any lights
you have created.
You can create lights that are local, near other objects. The following statement creates a yellow light positioned at (x,y,z),
and if you continually update lamp.pos, the light will move. You may wish to place a sphere or box with
material=materials.emissive at the same location so that the lamp looks like a glowing lamp.
lamp = local_light(pos=(x,y,z), color=color.yellow)
|
A distant red light located in the direction (x,y,z) is created like this:
distant_light(direction=(x,y,z), color=color.red)
|
Previous to Visual version 5, you set up a light by specifying a vector in the direction to the light from the origin,
and the magnitude of the vector was the intensity. For example,
scene.lights = [vector(1,0,0)] with
scene.ambient = 0 will
light the scene with full intensity from the right side, with no ambient lighting on the left. In Visual version 5 and later,
this scheme for specifying lights still works, but it is preferable to create light objects.
To obtain
camera position, see
Mouse Interactions.
objects A list of all the visible objects in the display; invisible objects and lights are not listed (scene.lights is a list
of existing lights). For example, the following makes all visible boxes in the scene red:
for obj in scene2.objects:
if obj.__class__ == box
obj.color = color.red
|
show_rendertime If you set scene.show_rendertime = 1, in the lower left corner of the display you will see something like
"cycle: 27 render: 5", meaning 27 milliseconds between renderings of the scene, taking 5 milliseconds to render, in which
case 22 out of 27 milliseconds were devoted to executing your Python statements.
stereo Stereoscopic option; scene.stereo = 'redcyan' will generate a scene for the left eye and a scene for the right eye, to
be viewed with red-cyan glasses, with the red lens over the left eye. (There are also 'redblue' and 'yellowblue' options; note
that objects that were not originally white may be somewhat dim.)
Setting scene.stereo = 'crosseyed' produces side-by-side images which if small enough can be seen in 3D by crossing your eyes
but focusing on the screen (this takes some practice). Setting scene.stereo = 'passive' produces side-by-side images which if
small enough can be seen in 3D by looking "wall-eyed", looking into the far distance but focusing on the screen (this too takes
some practice).
scene.stereo = 'active' will render alternating left eye/right eye images for viewing through shutter glasses if the graphics
system supports quad buffered stereo. If stereo equipment is not available, setting the option has no effect, and scene.stereo
will have the value 'nostereo'. You can also use scene.stereo = 'passive' with quad buffered stereo for display using two
polarized projectors (for stereo viewing using simple passive polarized glasses). (Quad buffered 'active' stereo is only
available on specialised graphics systems that have the necessary hardware and shutter glass connector, such as PCs with CRT
displays and nVidia Quadro graphics cards. It generates the illusion of depth by rendering each frame twice from slightly
different viewpoints corresponding to the left and right eyes. Special shutter glasses are synchronised with the alternating
images so that each eye sees only the matching frame, and your brain does the rest. It's called 'quad buffered' because there
is an OpenGL buffer per eye, both double-buffered for smooth updating. 'Passive' stereo requires a video card that can drive
two monitors, or two projectors.)
cursor.visible By setting scene.cursor.visible = 0, the mouse cursor becomes invisible. This is often appropriate while
dragging an object using the mouse. Restore the cursor with scene.cursor.visible = 1. NOT YET IMPLEMENTED IN VISUAL 5.
Controlling the window
The window attributes x, y, width, height, title, and fullscreen cannot be changed while a window is active; they are used to
create a window, not to change one. If you want to modify any of these window attributes, first make the window invisible, make
the changes, and then make the window visible again. This creates a new window with the new attributes; all existing objects
are still part of the new window.
x, y Position of the window on the screen (pixels from upper left)
width, height Width and height of the display area in pixels: scene.height = 200 (includes title bar).
title Text in the window's title bar: scene.title = 'Planetary Orbit'
fullscreen Full screen option; scene2.fullscreen = 1 makes the display named scene2 take up the entire screen. In this case
there is no close box visible; press Escape to exit.
(There is currently a bug in the fullscreen option for Linux; the Escape key has no effect. If you use the fullscreen option
on Linux, be sure to program a mouse or keyboard input for quitting the program.)
visible Make sure the display is visible; scene2.visible = 1 makes the display named scene2 visible. This is
automatically called when new primitives are added to the display, or the mouse is referenced. Setting visible to 0 hides the
display.
exit If sceneb.exit = 0, the program does not quit when the close box of the sceneb display is clicked. The
default is sceneb.exit = 1, in which case clicking the close box does make the program quit.
Controlling the view
center Location at which the camera continually looks, even as the user rotates the position of the camera. If you change
center, the camera moves to continue to look in the same "compass" direction toward the new center, unless you also change
forward (see next attribute). Default (0,0,0).
autocenter scene.center is continuously updated to be the center of the smallest axis-aligned box containing the scene. This
means that if your program moves the entire scene, the center of that scene will continue to be centered in the window.
forward Vector pointing in the same direction as the camera looks (that is, from the current camera location, given by
scene.mouse.camera, toward scene.center). The user rotation controls, when active, will change this vector continuously.
When forward is changed, the camera position changes to continue looking at center. Default (0,0,-1).
fov Field of view of the camera in radians. This is defined as the maximum of the horizontal and vertical fields
of view. You can think of it as the angular size of an object of size range, or as the angular size of the longer axis of the
window as seen by the user. Default pi/3.0 radians (60 degrees).
range The extent of the region of interest away from center along each axis. This is the inverse of scale, so use either range
or scale depending on which makes the most sense in your program. Setting range to 10 is the same as setting it to (10,10,10).
Setting range to (10,0,0) means that scene.center+scene.range will be at the right edge of a square window. A sphere of radius
10 will fill the window. A cubical box whose half-width is 10 will overfill the window, because the front of the box in 3D
appears larger than the xy plane passing through scene.center, unless the field of view is very small.
scale A scaling factor which scales the region of interest into the sphere with unit radius. This is the inverse of range, so
use either range or scale depending on which makes the most sense in your program. Setting scale to 0.1 is the same as setting
it to (0.1,0.1,0.1) or setting range to (10,10,10).
up A vector representing world-space up. This vector will always project to a vertical line on the screen (think of the camera
as having a "plumb bob" that keeps the top of the screen oriented toward up). The camera also rotates around this axis when the
user rotates "horizontally". By default the y axis is the up vector.
There is an interaction between up and forward, the direction that the camera is pointing. By default, the camera points in
the -z direction (0,0,-1). In this case, you can make the x or y axes (or anything between) be the up vector, but you cannot
make the z axis be the up vector, because this is the axis about which the camera rotates when you set the up attribute. If you
want the z axis to point up, first set forward to something other than the -z axis, for example (1,0,0).
autoscale = 0 no automatic scaling (set range or scale explicitly); autoscale = 1 automatic scaling (default). It is often
useful to let Visual make an initial display with autoscaling, then turn autoscaling off to prevent further automated changes.
userzoom = 0 user cannot zoom in and out of the scene
userzoom = 1 user can zoom (default)
userspin = 0 user cannot rotate the scene
userspin = 1 user can rotate (default)
Materials and Textures
You can specify a material such as wood for any object other than a points object:
sphere(color=color.orange, material=materials.wood)
|
The materials that are currently available include these:
- materials.wood
- materials.rough
- materials.marble
- materials.plastic
- materials.earth
- materials.diffuse
- materials.emissive (looks like it glows)
- materials.unshaded (unaffected by lighting)
The example program
material_test.py displays all of these materials. The
emissive material is particularly appropriate for
simulating the appearance of a light glowing with the specified color. This apparent light has no lighting effect on other
objects, but you may wish to place a local_light at the same location, as is done with the swinging light in the example
program
texture_and_lighting.py. The appearance of the
unshaded material is unaffected by lighting and is useful when you
want to display an object whose appearance is determined solely by its own attributes.
Materials will work with graphics cards that support Pixel Shader 3.0 ("PS 3.0"). For details, see
 http://en.wikipedia.org/wiki/Pixel_shader#Hardware
. Some materials may work with graphics cards that support PS 2.0, but other
materials may need to be manually disabled; see instructions in the
site-settings.py module in the Visual package in your
site-packages folder. If the graphics hardware does not support pixel shaders, the material property is ignored. If you think
you should be able to use materials but have trouble with their display or performance, we highly recommend upgrading your
video card drivers to the latest version.
Some materials such as wood are oriented to the specified axis. For example, a wood box with default axis = (1,0,0) shows
tree rings on its yz surfaces and stripes on the other faces. Changing the axis changes which face you see the tree rings on.
Creating your own texture
You can create a texture object and then apply it to the surface of an object. A surface texture is an M by N array of slots
containing 1, 2, 3, or 4 numerical values. M and N must be powers of 2 (1, 2, 4, 8, 16, 32, 64, 128, 256, 512, etc.).
The numerical values can represent color, luminance (brightness or shades of gray), or opacity.
Here are the possibilities for each slot in the array:
- 1 value: luminance by default, or specify channels=["opacity"] to represent opacity
- 2 values: luminance and opacity
- 3 values: red,green,blue
- 4 values: red,green,blue,opacity
Here is an example program in which a 4 by 4 by 1 checkerboard texture is created and applied to a box:
from visual import *
checkerboard = ( (0,1,0,1),
                 (1,0,1,0),
                 (0,1,0,1),
                 (1,0,1,0) )
tex = materials.texture(data=checkerboard,
                     mapping="rectangular",
                     interpolate=False)
box(axis=(0,0,1), color=color.cyan, material=tex)
|
The example above uses a rectangular mapping, which places the texture on two opposing faces of a box, with stripes along the
sides. By default, one of the faces is in the (1,0,0) direction, but this can be changed by specifying a different axis for
the box, as was done in the example above. A sign mapping is similar to rectangular but is unaffected by the color of the
object and appears on only one face of a box (determined by the axis of the box). A spherical mapping wraps around the
entire object. In the example program texture_and_lighting.py you can find a creation of a beach ball using spherical mapping.
By default interpolate is True, but to get a sharply defined checkerboard in the example above, it was set to False.
You can save the texture data in a file for later use:
materials.saveTGA("checks", checkerboard)
|
This saves the checkboard pattern in a file "checks.tga", a targa file which many graphics applications can display. In later
programs you can use this data without recreating it:
data = materials.loadTGA("checks")
|
More generally, any targa file whose width and height are both powers of 2 can be read as data using materials.loadTGA(filename).
If the actual file name is "checks.tga" you can give the full file name or just "checks".
One way to create a pattern is to start by creating a numpy array of zeros, then assign values to individual slots:
pattern = zeros((4,8,3))
pattern[0][0] = (1,.5,.7)
|
Another example
Here is an example of placing a "sign" on one face of a box, consisting of a 2 by 2 by 3 grid of color components:
from visual import *
grid = ( (color.red, (1, 0.7 ,0)),
         ((0, 1, 0.3), color.magenta) )
tgrid = materials.texture(data=grid,
                          mapping="sign",
                          interpolate=False)
box(axis=(0,0,1), material=tgrid)
|
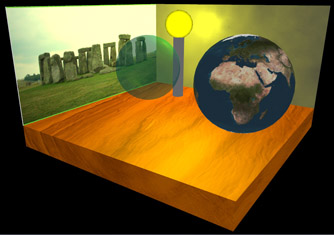
Making a texture from a photo
A texture can be created from a targa file, and various graphics applications can convert photos in jpeg or other formats
to targa files. One tool for doing this is PIL, the Python Imaging Library, which can be downloaded and installed (you can
find it with a web search). Here is an example of PIL code which converts a jpeg photo into a targa file which can be used
to create a texture for displaying the image, as in the example program stonehenge.py.
from visual import *
import Image
name = "flower"
width = 128
height = 128
im = Image.open(name+".jpg")
im = im.resize((width,height), Image.ANTIALIAS)
materials.saveTGA(name,im)
|
At a later time you can say data = materials.loadTGA(name) to retrieve the image data from the targa file.
As a convenience, a texture can also be created directly from the PIL image data, like this:
tex = materials.texture(data=im, mapping="sign")
|
Efficiency issues
Normally you create a data pattern containing values in the range from 0.0 to 1.0, the standard range of color components
and opacity in Visual. However, the underlying graphics machinery works with values in the range of 0 to 255, which can be
expressed in one 8-bit byte of computer memory. If you are dealing with large textures and time is critical, you should avoid
conversions from the range 0-1 to the range 0-255 by constructing the texture data from a numpy array of unsigned 8-bit bytes.
An unsigned byte is referred to as ubyte. Here is a simple example:
checkers = array( ( (0,255,0,255),
                    (255,0,255,0),
                    (0,255,0,255),
                    (255,0,255,0) ), ubyte)
|
The array function converts a sequence of values into a numpy array. In this case the values are 8-bit bytes.
Channels
Data "channels" are a part of the definition of a texture. For the most part, these channels are assigned automatically for
you, like this:
- 1 value: channels=["luminance"] by default, channels=["opacity"] to represent opacity
- 2 values: channels=["luminance","opacity"]
- 3 values: channels=["red","green","blue"]
- 4 values: channels=["red","green","blue","opacity"]
Except for specifying that a pattern represents opacity rather than luminance (brightness, or shade of gray), it isn't
necessary to specify channels when constructing a texture because the channel options shown above are currently the only
valid sets of channels. However, it is expected that in the future there may be additional channels available, such as
glossiness.
mipmap
When an object in the scene is small and far away, there is no need to display its texture in full detail. With the default
mipmap=True, Visual prepares a set of smaller textures to use when appropriate. These additional textures take some time to
prepare for later use, and required storage space is one-third larger, but they can speed up the rendering of a scene. It
should rarely be the case that you would need to set mipmap=False.
Creating your own materials
Creating your own materials (in contrast to creating textures) is technically somewhat challenging. The program materials.py,
a component of the Visual module, contains the shader models for wood and other materials, and it also contains instructions
on how to build your own materials. Shader models are written in a C-like language, GLSL (OpenGL Shader Language).
Defaults
Convenient Defaults
Objects can be specified with convenient defaults:
arrow() is equivalent to arrow(pos=(0,0,0), axis=(1,0,0), radius=1)
box() is equivalent to box(pos=(0,0,0), size=(1,1,1))
cone() is equivalent to cone(pos=(0,0,0), axis=(1,0,0), radius=1)
convex() establishes an "empty" object to which points can be appended
curve() establishes an "empty" curve to which points can be appended
cylinder() is equivalent to cylinder(pos=(0,0,0), axis=(1,0,0), radius=1)
ellipsoid() is equivalent to ellipsoid(pos=(0,0,0), size=(1,1,1))
frame() establishes a frame with pos=(0,0,0) and axis=(1,0,0)
helix() is equivalent to helix(pos=(0,0,0), axis=(1,0,0), radius=1, thickness=0.05, coils=5)
points() establishes an "empty" set of points to which points can be appended
pyramid() is equivalent to pyramid(pos=(0,0,0), size=(1,1,1), axis=(1,0,0))
ring() is equivalent to ring(pos=(0,0,0), axis=(1,0,0), radius=1)
sphere() is equivalent to sphere(pos=(0,0,0), radius=1 )
Animation Speed
Limiting the Animation Rate
rate( frequency )
Halts computations until 1.0/frequency seconds after the previous call to rate().
For example, rate(50) will halt computations long enough to make sure that at least 1.0/50.0 second has elapsed. If this much
time has already elapsed, no halt is performed. If you place rate(50) inside a computational loop, the loop will execute at a
maximum of 50 times per second, even if the computer can run faster than this. This makes animations look about the same on
computers of different speeds, as long as the computers are capable of carrying out 50 computations per second.
Rotations
Rotating an Object
Objects other than curve, convex, faces, and points can be rotated about a specified origin (to rotate these other objects,
put them in a frame and rotate the frame).
obj.rotate(angle=pi/4., axis=axis, origin=pos)
|
The rotate function applies a transformation to the specified object (sphere, box, etc.). The transformation is a rotation
of
angle radians, counterclockwise around the line defined by
origin and
origin+axis. By default, rotations are around the
object's own
pos and
axis.
Also see the rotation function available for
vectors.
Additional Options
Additional Attributes
The following attributes apply to all VPython objects:
visible If false (0), object is not displayed; e.g. ball.visible = 0
Use ball.visible = 1 to make the ball visible again.
frame Place this object into a specified frame, as in ball = sphere(frame = f1)
display When you start a VPython program, for convenience Visual creates a display window and names it scene. By default,
objects you create go into that display window. You can choose to put an object in a different display like this:
scene2 = display( title = "Act IV, Scene 2" )
rod = cylinder( display = scene2 )
|
Executing
myscene = display.get_selected() returns a reference to the display in which objects are currently being created.
Given a specific display named scene2,
scene2.select() makes scene2 be the "selected display", so that objects will be drawn
into scene2 by default.
There is a
rotate function for all objects other than curve, convex, faces, and points (which can be put into a frame and the
frame rotated).
__class__ Name of the class of object. For example,
ball.__class__ is sphere is true if
ball is a sphere object. There are two
underscores before and after the word
class. In a list of visible objects provided by
scene.objects, if
obj is in this list you
can determine the class of the object with
obj.__class__.
__copy__() Makes a copy of an object. There are two underscores before and after
copy. Without any arguments,
this results in creating a second object in the exact same position as the first, which is probably not what you want.
The
__copy__() function takes a list of keyword=value argument pairs which are applied to the new object before making it
visible. For example, to clone an object from one display to another, you would execute:
new_object = old_object.__copy__( display=new_display). Restriction: If the original object is within a frame, and the new
object is on a different display, you must supply both a new display and a new frame for the new object (the new frame may be
None). This is due to the restriction that an object may not be located within a frame that is in a separate display.
Here is an example that uses the
__copy__() function. The following routine copies all of the Visual objects currently
existing in one display into a previously defined second display, as long as there are no nested frames (frames within frames):
def clone_universe( new_display, old_display):
frames = {}
for obj in old_display.objects:
if obj.__class__ == frame:
frames[obj] = obj.__copy__( frame=None,
display=new_display)
for old, new in frames.iteritems():
if old.frame:
new.frame = frames[old.frame]
for obj in old_display.objects:
if obj.__class__ == frame:
pass
elif obj.frame:
obj.__copy__( display=new_display,
frame=frames[obj.frame])
else:
obj.__copy__( display=new_display)
|
Delete an Object
Deleting an Object
To delete a Visual object just make it invisible: ball.visible = 0
Technical detail: If you later re-use the name ball, for example by creating a new object and naming it ball, Python will be
free to release the memory used by the object formerly named ball (assuming no other names currently refer to that object).
3/4 = 0 ?
Floating Division
By default, Python performs integer division with truncation, so that 3/4 is 0, not 0.75. This is inconvenient when doing
scientific computations, and can lead to hard-to-find bugs in programs. You can write 3./4., which is 0.75 by the rules of
"floating-point" division.
You can change the default so that 3/4 is treated as 0.75. Place this at the start of your program:
from __future__ import division
|
There are two underscores ("_" and "_") before "future" and two after.
The Visual module converts integers to floating-point numbers for you when specifying attributes of objects:
object.pos = (1,2,3) is equivalent to object.pos = (1.,2.,3.)